
This repository hosts a NextJS storefront designed for seamless integration with Medusa, an open-source headless e-commerce engine. It leverages Plasmic, an open-source visual builder studio for React, allowing for easy visual edits and customization of the storefront.
Plasmic Studio Project: https://studio.plasmic.app/projects/kZYdLdyCWduEwLJ51vftX9 (runs only with http://localhost:3000, read instructions!)
🚧 Warning: This storefront is in its very early stages of development. Expect inconsistencies in the code and potential bugs. Currently, this project utilizes NextJS 13 App Router. Support for NextJS 14 App Router in Plasmic is in early beta. We plan to upgrade to the NextJS 14 App Router once it's generally available.
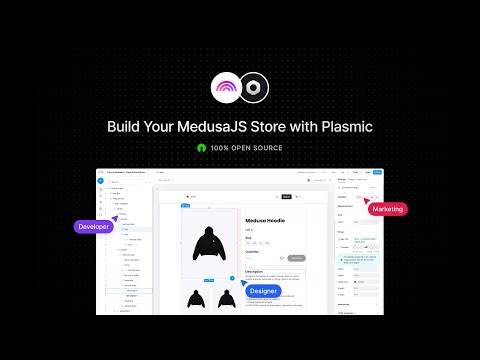
Click on the image above to watch tutorial 👆
- Customizable Storefront: Utilize Plasmic's visual design capabilities to tailor your storefront to your brand's needs without deep coding.
- Flexible E-commerce Engine: Medusa's headless architecture allows for versatile backend management, making it adaptable to various e-commerce scenarios.
- Open Source: Fully open-source stack, perfect for community collaboration and enhancements.
Before setting up the Plasmic Storefront, ensure the following requirements are met:
-
Medusa Backend: You must have a deployed Medusa backend instance. Ensure that CORS is configured to allow requests from
http://localhost:3000to accommodate local development. -
⚠️ Medusa Configuration: It's crucial to activate specific feature flags in yourmedusa-config.js. Enable product categories by adding the following configuration:module.exports = { projectConfig, plugins, modules, featureFlags: { product_categories: true } }
The Plasmic CLI is essential for interacting with the Plasmic service. To install the CLI globally using npm, run the following command:
npm install -g @plasmicapp/cli
Ensure all conditions are met before proceeding with the installation and setup.
Follow these steps to get your development environment set up:
Clone the Repository: Begin by cloning the repository to your local machine. Open a terminal and run the following command:
git clone https://github.com/pavlotsyhanok/medusa-plasmic-storefront.git
Navigate to the Project Directory: Change to the project directory with:
cd medusa-plasmic-storefront
Install Dependencies: Install all the necessary dependencies using npm:
npm install
Run the Development Server:
Start the development server. This will host your project locally on http://localhost:3000, which is necessary before proceeding to the Plasmic Studio.
npm run dev
Open the Project in Plasmic Studio: Once your local server is running, you can begin working with the storefront in Plasmic Studio. Open Plasmic Studio and duplicate the project from the following link: MedusaJS - Plasmic Demo Store. After duplicating the store, you can open your copy and start customizing the storefront.
These steps will set up the Plasmic Storefront on your local machine and prepare you for visual editing and further development in Plasmic Studio.
What things you need to install the software and how to install them:
npm install medusa-cli -g
npm install @plasmicapp/cli -g
To authorize your Plasmic account with the CLI, run the following command in your terminal:
plasmic authThis is a Next.js project bootstrapped with create-plasmic-app.
Follow these steps to get your development environment set up:
-
Clone the Repository: Begin by cloning the repository to your local machine. Open a terminal and run the following command:
git clone https://github.com/pavlotsyhanok/medusa-plasmic-storefront.git
-
Navigate to the Project Directory: Change to the project directory with:
cd medusa-plasmic-storefront -
Install Dependencies: Install all the necessary dependencies using npm:
npm install
-
Run the Development Server: Start the development server. This will host your project locally on
http://localhost:3000, which is necessary before proceeding to the Plasmic Studio.npm run dev
-
Open the Project in Plasmic Studio: Once your local server is running, you can begin working with the storefront in Plasmic Studio. Open Plasmic Studio and duplicate the project from the following link: MedusaJS - Plasmic Demo Store. After duplicating the store, you can open your copy and start customizing the storefront.
These steps will set up the Plasmic Storefront on your local machine and prepare you for visual editing and further development in Plasmic Studio.
Once your local development environment is set up with NextJS running on http://localhost:3000 and you have opened your project in Plasmic Studio, you're ready to start configuring and customizing your storefront.
Follow the authentication instructions provided within Plasmic Studio to securely connect your local environment.
To view and modify the code:
- Click on the "code" button located at the top right of your screen in Plasmic Studio. This will show you how to configure your project and integrate your changes.
After making design changes in Plasmic Studio that you wish to apply to your local project, you'll need to sync these changes. Run the following command in your terminal where your local server is running:
plasmic sync --projects 'YOUR PROJECT ID' --yesFinding Your Project ID: Your Project ID can be found in the URL of your Plasmic Studio, or by clicking on the "code" button where it is usually displayed.
This command will download all the updated code to your local repository. Once the sync is complete, you can commit these changes to your GitHub repository and host your updated storefront independently from Plasmic.
During your work with Plasmic Studio and the NextJS storefront, you might encounter a few common issues. Here are some tips to help resolve them:
If your project is not loading properly in Plasmic Studio, follow these steps:
-
Verify NextJS Server: Ensure that your NextJS application is running on
http://localhost:3000. The local server must be active as Plasmic Studio will attempt to communicate with it. -
Check Plasmic Host App URL: Make sure that your Plasmic host app URL is correctly set to
http://localhost:3000/plasmic-host. Incorrect settings here can prevent Plasmic Studio from loading your project.
Enter Host App URL: You may encounter a pop-up asking you to enter your host app URL. Ensure you provide the correct URL http://localhost:3000/plasmic-host to facilitate the connection between Plasmic Studio and your local server.
With Plasmic, you can enable non-developers on your team to publish pages and content into your website or app.
To learn more about Plasmic, take a look at the following resources:
You can check out the Plasmic GitHub repository - your feedback and contributions are welcome!